How To Build Dynamic Components in Angular 6

Dynamic Components in any framework/library makes building large-scale apps way easier.
Let’s take a look at how we can build dynamic components in Angular 6.
Tip: Use Bit to share and reuse your components between apps. It helps you discover and play with components, using them to build faster. Give it a try.

Getting Started with Angular
First, create a new Angular project. If you don’t have Angular globally installed on your system, or if you are still using an old version of Angular, run the following command on your terminal:
$ npm install -g @angular/cliFor the sake of this post, I have created a simple Angular App. Go ahead and clone it into your system.
$ git clone https://github.com/rajatgeekyants/hero.git
$ cd hero
$ yarn install
$ ng serve --open
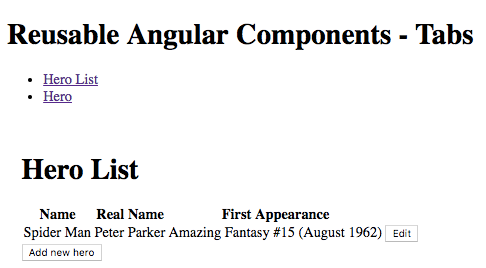
This will launch the app, and the --open flag will automatically open a browser on http://localhost:4200/.

Write a Template within a Template
Angular comes with a component called ng-template that allows us to declare any part of the Angular template. This is a great way of giving a flavor of dynamic-ness to our template, giving us the ability to take our code and pass it around to other components.
In the app.component.ts file, write a new ng-template component at the end of the template.
<ng-template #hello>
  Hello, World
</ng-template>
If you open the app now, you will see that the app new text does not render. That’s because things that are inside ng-template component can only be grabbed and used somewhere else later.
To be able to grab this template, I have given it a variable called hello. Now go into the Component code of this file, and add the hello variable inside ViewChild. Import ViewChild from @angular/core.
export class AppComponent implements OnInit, AfterViewInit {
  @ViewChild('hello') helloTemplate;
  heroes;
}
We now need to be able to access the code that is grabbed by the ViewChild. To do so, we are going to use a lifecycle hook called AfterViewInit. Make sure that you import AfterViewInit from @angular/core as well. Write the following code inside the Component:
ngAfterViewInit() {
  console.log(this.helloTemplate);
}
Open your browser developer tools. You will notice there is TemplateRef there that has a couple of properties inside it. We will look into these later on.

Pass a Reference of the Template To A Component
If you take a look at the tab.component.ts file, you will see that it uses an ng-content component to render the content that is given by the developer. Let’s see how we can make one of the tabs to display the hello variable that we had defined earlier using ng-template and render it using ng-container and ngTemplateOutlet.
First, remove the text that is being passed by the Hero tab. We want this tab to render the text that is inside the hello variable.
<ngx-tab tabTitle="Hero" [template]="hello"></ngx-tab>Then, go to the tab.component.ts file and declare the template as an input inside TabComponent:
export class TabComponent {
  @Input() tabTitle: string;
  @Input() active = false;
  @Input() template; // new line
}
Inside the @Component‘s template, we have a ng-content component that is not rendering anything. Add to the ng-content component, a condition that that says that ng-content should render an empty space if there is no template.
<ng-content *ngIf=”!template”></ng-content>Below this line create a ng-container component that will render the template.
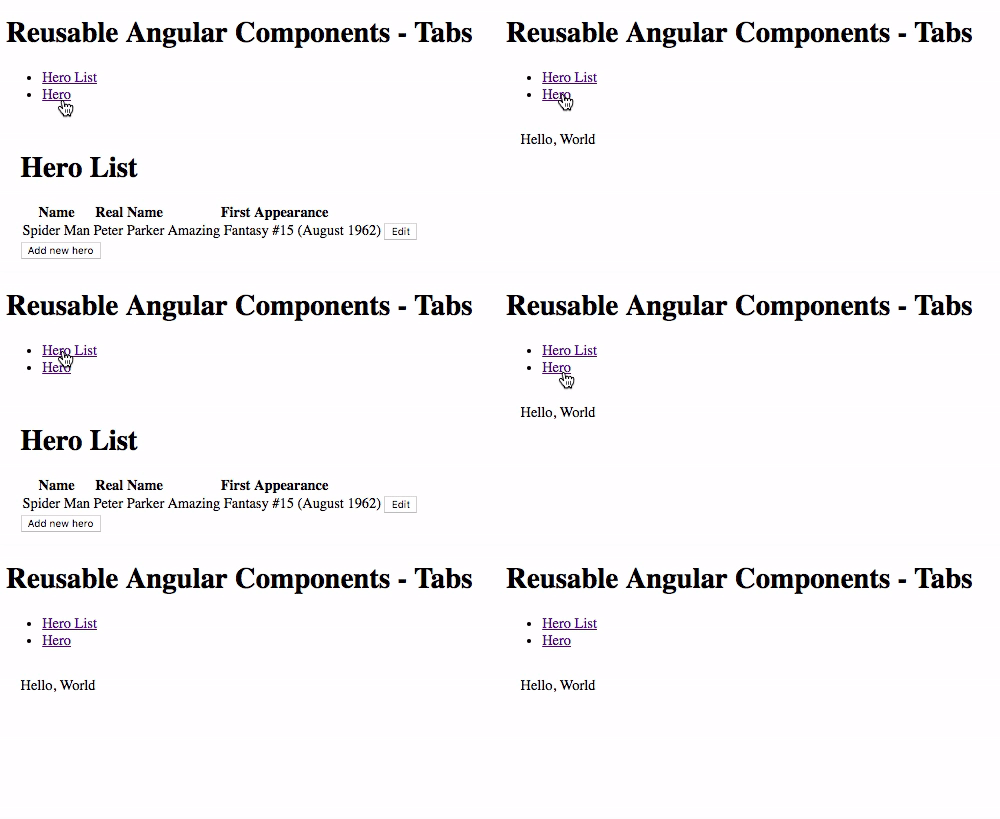
<ng-container *ngIf="template" [ngTemplateOutlet]="template"></ng-container>Refresh your browser, and you will see the second tab renders the hello variable.

Pass Data to a Dynamic ng-template
Our tabs are working quite well now, but what we really want to do is pass some data from the outside and render it dynamically. To do this, we can use ngTemplateOutletContext to pass in the data to the ng-template.
First, go to the tab.component.ts file and add a new Input() inside the TabComponent task. This Input() is going to pass in the data from the outside.
export class TabComponent {
  @Input() tabTitle: string;
  @Input() active = false;
  @Input() template;
  @Input() dataContext;
}
We now need to pass on this data on to our template. This is done using the ngtemplateOutletContext property on the ng-container component.
<ng-container
  *ngIf="template"
  [ngTemplateOutlet]="template"
  [ngTemplateOutletContext]="{data: dataContext}"
></ng-container>
The reason I am using an object to pass on the dataContext to the property is that I then get the choice of extending this property so it can take on other types of data.
Now go to the app.component.ts file and leverage the dataContext inside the second ngx-tab component.
<ngx-tab
  tabTitle="Hero"
  [template]="hello"
  [dataContext="heroes[0]"]
></ngx-tab>
We only have one entry inside the heroes array. This data gets passed in, and then, inside the ngx-tab component, we’ll pass it along to our template, which, in this case, resides here.
Now we can leverage this data object and use it inside our component. I want to visualize that person’s name, so I would do something like hero?.name. The ? is placed here in case the hero is undefined. We also need to define the hero as data.
<ng-template #hello let-hero="data">
  Hello, {{hero?.name}}
</ng-template>
Once your browser refreshes, jump to the second tab and you will see that the name gets properly visualized.
Anchor Point
When dynamically instantiating a component, we have to know where to place the component within another component’s template.
To do this, we can use a custom directive that exposes a ViewContainerRef and serves us as an anchor point which we can reference later on.
First, go to tabs.component.ts, and create a new ng-template component inside the @Component‘s template.
<ng-template appDynamicTabAnchor></ng-template>This is the region where we are going to inject the dynamic components later on. First, we need to have a way for referencing the ng-template component. We also need access to the ViewContainerRef, which will allow us to create components dynamically.
Use the Angular CLI and create a new directive that will serve us as an anchor point:
$ ng g d tabs/dynamicTabAnchor --flat --spec falseThis will create a new file inside the tabs folder called dynamic-tab-anchor.directive.ts. Write the following code inside it:
import { Directive, ViewContainerRef } from '@angular/core';@Directive({
  selector: '[appDynamicTabAnchor]'
})
export class DynamicTabAnchorDirective {
  constructor(public viewContainer: ViewContainerRef) { }
}
We also need to import this file to the tabs.component.ts file.
import {DynamicTabAnchorDirective} from './dynamic-tab-anchor.directive.ts';We can now use the @ViewChild inside the TabsComponent class and grab all the instances of the dynamic tab anchor directives inside the dynamicTabPlaceholder.
@ViewChild(DynamicTabAnchorDirective)
dynamicTabPlaceholder; DynamicTabAnchorDirective
We can now create an openTab method. This method will then be called from the outside. I am only going to log out the ViewContainerRef for now.
openTab() {
  console.log(this.dynamicTabPlaceholder.viewContainer)
}
Go to the app.components.ts file and hook the openTab method on the app-heroes-list component:
<app-heroes-list [heroes]=”heroes” (addPerson)="onAddPerson()"></app-heroes-list>We have to implement this inside the AppComponent class. Here, we will call the openTab function that we had created inside the tabComponent.
onAddPerson() {
  this.tabsComponent.openTab();
}
Now, if you click on the Add new button, you will see the ViewContainerRef printed out in the DevTools.
Conclusion
Dynamic components are reusable and make building large-scale applications easier. This post is just a stepping stone towards bringing dynamicity to Angular components.
I hope this post helped you get a better handle on dynamicity in Angular. Stay tuned for more posts on Angluar, Vue, React, and other popular frameworks/libraries.


