How to Share and Reuse Micro Frontends
A comprehensive guide on reusing micro frontends. Leverage the right tool for reusing existing micro frontends across different projects.

On paper, micro frontends are great. You can build them in parallel with multiple teams at the same time, individually from each other, and then you can mix and match them to compose multiple applications without having to rewrite their logic.
They’re like magic!
But in practice, the process of sharing and reusing these micro frontends is not trivial.
So in this article, I’m going to show you how you can reuse them in multiple projects without breaking a sweat.
Let’s go!
The tool we’ll be using for this
Clearly, by themselves, micro frontends do not provide you with any means to reuse them or even share them across multiple teams or with the dev community in general.
So we’ll need some sort of tooling, and today I’ll tell you about Bit.
Bit and Bit Cloud (their cloud-based marketplace) offer a complete solution for innovative teams building composable software products. As the industry-leading component-driven development platform, it powers composable app development at scale for thousands of teams and Fortune 500 companies.
Below are some of the key capabilities required for a CDD platform and provided by Bit.
- Component-driven development toolset
- Component source-code control and versioning
- Dependency management: automated, smart and consistent
- Packaging and distribution
- Central platform for sharing and collaborating
- Discoverability and search
- Consumption, installation and integration (build time and runtime)
Why am I talking about “composable app development” and “component-driven” something here? Because that’ll be the key to solving our problem.
You see, Bit has this concept of “component” which encapsulates not only code but also tests and documentation of a logical component. This concept of “component” can then be mapped to our micro frontends.
If we think of a micro frontend as a Bit component, we then gain the benefits we mentioned above.
Suddenly, our micro frontend is:
- Composable
- All dependencies are easily managed.
- Simple to distribute as an individual package.
- Through Bit.cloud it can also be easily discovered.
- And through Bit, installing these packages is as trivial as running a single command.
Let’s look at a practical example of reusing some micro frontends inside another project.
Did you like what you read? Consider subscribing to my FREE newsletter where I share my 2 decades’ worth of wisdom in the IT industry with everyone. Join “The Rambling of an old developer”!
Reusing existing micro frontends
If you’re wondering how to create your own micro frontends with Bit, you can read the following article where I show you everything step-by-step:
However, if all you need is to reuse them, the process is a little bit simpler.
The first thing you’ll want to do is to install Bit with the following line:
npx @teambit/bvm installOnce installed, Bit is ready to start adding packages to your project, however, you need to understand all the ways in which you can do that.
Through Bit.cloud, first, locate the micro frontend you wish to install, for instance, let's take a look at the Blog micro frontend I built a while ago. It’s a simple micro frontend that lists articles.
On the top-right corner of the page, you’ll find a “Use” button, which displays the following menu once clicked:
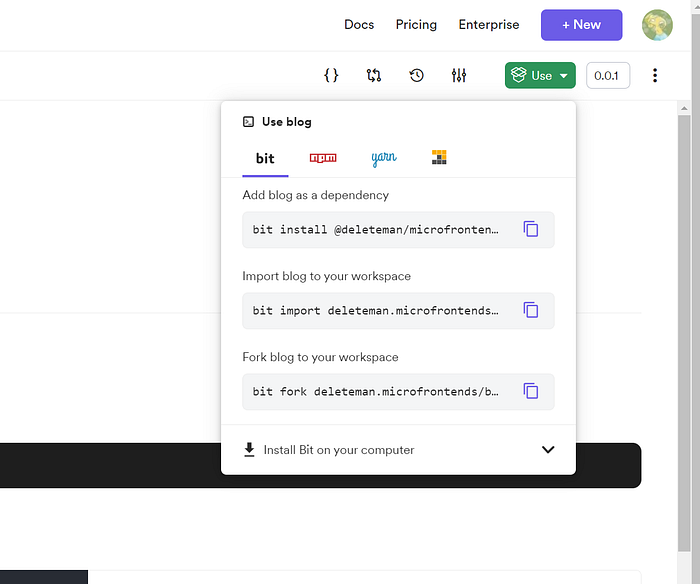
As you can appreciate, aside from using Bit, you can also use “npm”, “yarn” and “pnpm”. With all of them, the process is simple, just use the line provided by the website, and you’ll be fine. In fact, that method doesn’t require Bit to be installed on your system at all. Although, you will have to configure the custom Bit registry with this command:
npm config set '@deleteman:registry' https://node.bit.cloudNote the “@deleteman” part, that’s my username, make sure to replace that with your own username before running the command.
However, as you probably know by now, these tools also directly install all dependencies inside the node_modules folder. That’s useful, but it keeps you from easily accessing the code of the package, or even making a change to it. And while you don’t normally want to change someone else’s packages, here we’re talking that you might be also interested in reusing your own micro frontends. And given that scenario, making a change here and there could come in handy.
And if that’s the case, you’ll want to know about Bit’s options:
- Installing: This option works pretty much like using npm, you install the component into your project and it is saved inside the
node_modulesfolder, as you’d expect. - Importing: Instead of saving your dependencies like the previous option, this command will download the package inside a new folder at the root of your workspace. That way you can easily access the code without having to dig into the
node_modulesblack hole. On top of that, Bit will also create a symlink insidenode_modulesfor each of your imported components, and it’ll point them to the newly downloaded files. This way you can stillimportthe components in your code as if they were regular external components. If you make any changes to the imported micro frontend, you’ll be able to push those updates as a new version. This is the perfect option if you’re looking to collaborate with others on developing and scaling your micro frontend. - Forking: However, if you want to create a copy of a micro frontend and then make changes, making it your own, Forking is the right option. It works just like the “import” command, but it doesn’t download the version history, making it essentially a brand-new component awaiting your changes.
Read more about importing or forking components on Bit’s official documentation site.
With all of this in mind, let’s look at a practical example using my own micro frontends to build a brand new project from scratch.
Building our website with micro frontends
For our example, we’re going to create a website that has a home screen with 2 links:
- Blog, where we’ll use the
Blogmicro frontend to display our blog. - Docs, where we’ll use the
Documentationmicro frontend to display some internal navigation and custom pages.
Granted, these are all example micro frontends, but you can extrapolate this example into something useful for your use case.
We'll use Bit to both create our React app and then install micro frontends.
Before we start coding, let’s first create a Bit workspace to put our application’s code in there. That way, we’ll be able to share it later on (more on this in a minute).
your-project-folder> bit new react workspace --env teambit.react/react-env --default-scope fdoglio.test-websiteFrom now on, we’ll be working inside the workspace folder.
Now, let’s create a new React application that we can later share through Bit as well.
For that, we’ll use the following command:
bit create react-app apps/website --aspect teambit.react/react-envThis will create a apps/website folder inside your default scope (in our case that’s test-website).
Now set up the app like this:
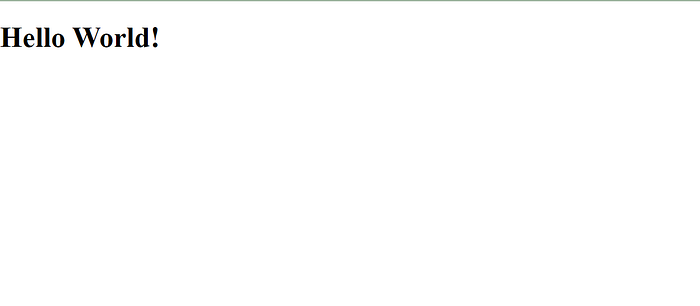
bit use apps/websiteAnd you can finally test it with bit run website . This is going to start a server on port 3000, and you’ll see something very basic like:
We’re now going to change the apps/website/website.tsx file to have the following code:
import './App.css';

export function Web() {
  return (
    <div className="App">
      <header className="App-header">
        <p>
         Welcome to our website!
        </p>
        <p>
          Please visit our <a href="/docs">docs</a> to learn more about our product.
          Or just check out our <a href="/blog">technical blog.</a>
        </p>

      </header>
    </div>
  );
}
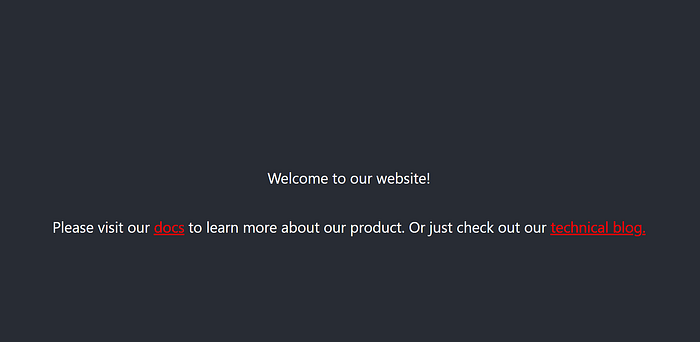
We could simplify this even further, but for the sake of not over-complicating things, here is what the new home page looks like:
Let’s now add the routes for those two sections. The Blog one is the easiest, so let’s start there.
The first thing we need to do is to import the FakeBlog micro frontend using Bit.
<your-project-folder> bit import fdoglio.microfrontends/fake-blogAnd we’ll also import the Documentation site component, from another user, like this:
bit import deleteman.microfrontends/docsAs a note, make sure you don’t have a dev server running while you run this command, otherwise the import will fail because it’ll try to rename some folders and it won’t be able to do it. And if you still get permission problems while doing this, try closing your IDE and running this from an external terminal window.
Now, you should have a folder structure similar to this one inside your workspace folder:
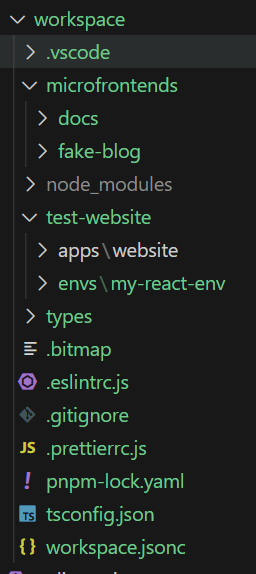
Notice how both, the docs and the fake-blog components are inside the same folder, even though they’re from different users. And at the same, the final application is inside our new scope ( test-website ).
Let’s now edit the file at apps/website/website.tsx to add the logic required to show the blog:
import React, { useState } from 'react';
import {FakeBlog} from '@fdoglio/microfrontends.fake-blog'
import './App.css';

export function Website() {
  const [page, setPage] = useState("home")

  function navTo(event, target) {
    event.preventDefault()
    setPage(target)
    return false;
  }
  if(page == "home") {
    return (
      <div className="App">
        <header className="App-header">
          <p>
          Welcome to our website!
          </p>
          <p>
            Please visit our <a href="#" className='inline' onClick={(evt) => navTo(evt,'docs') }>docs</a> to learn more about our product.
            Or just check out our <a href="#" className='inline' onClick={(evt) => navTo(evt, 'blog')}>technical blog.</a>
          </p>

        </header>
      </div>
    );
  }
  if(page == "blog") {
    return (
      <>
        <FakeBlog />
        <p>
          Go back <a href="#" className='inline' onClick={(evnt) => navTo(evnt, 'home')}>Home</a>
        </p>
      </>
    )
  }

}
Notice how I’m importing the FakeBlog component (one of the micro frontends we imported before). Even though the files are located somewhere else, I can treat them as if they were copied inside the node_modules folder.
On top of that, I’m not adding any extra routing, so I’m simulating the navigation with a simple page state variable.
Now, for the Docs micro frontend, the behavior is the same, we’ll just add a new if statement to render the right component:
import {Docs} from "@deleteman/microfrontends.docs"

 if(page == "docs") {
    return (
      <>
      <Docs />
        <p>
          Go back <a href="#" className='inline' onClick={(evnt) => navTo(evnt, 'home')}>Home</a>
        </p>
      </>
    )
  }
Again, I’m importing the Docs component as if it was installed inside the node_modules , even though we know better by now.
And here is the end (and ugly) result:
We have a blog loading data from an external API, and a fully working navigation for our documentation section with new internal links and pages by simply adding 2 micro frontends to our project.
Powerful stuff!
Pushing the final product up to Bit
Yes, with Bit you don’t just share components, you can also share full-blown applications.
Why would you do that? Because these guys are actually giving you the ability to configure the CI from their platform.
You can learn more about how to automate your micro frontend-based app deployments using Bit, by reading their documentation.
The gist of it though, is that bit applications can be tagged (versioned) and shared as a component. This gives teams a lot of wiggle room when it comes to testing the final product. In fact, other developers can install it and work on it, while at the same time having a fully working CI/CD pipeline.
By now, we’ve already created our entire application as a bit application, so the only missing steps are to tag it and share it:
bit tag
bit export
The first one will run tests, lint the code and it’ll make sure everything works as expected. And if it does, it’ll version them to version 0.0.1.
The last command will upload both files to the cloud. In my case, you can see the end result here.
You’ll also notice that if you click on the “Dependencies” tab, you’ll see the 2 micro frontends we used to create the app:
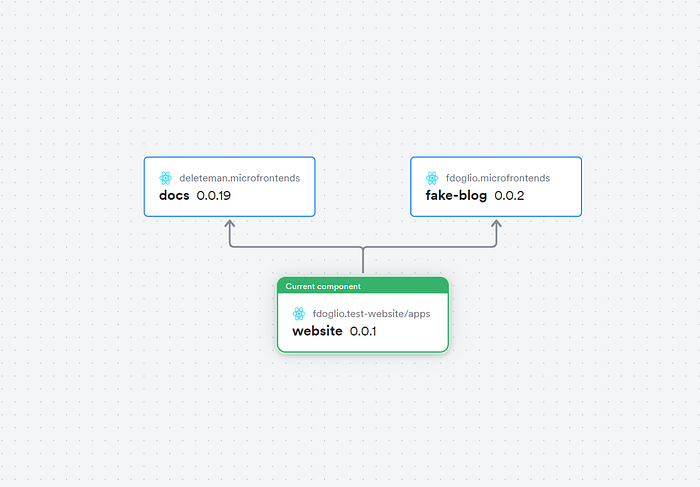
And now our project is ready to be collaborated on by our teammates.
Success!
Micro frontends pose a fantastic reusability solution. You can create complex websites and applications by re-using already existing ones.
Teams can create these components individually, and others can mix and match them together. It’s a lot like playing with Lego bricks if you think about it.
The problem, of course, is that sharing and using those “blocks” is not trivial. Tools are needed to discover them and install them into new projects. Lucky for us, with Bit we can use its component-driven approach to create, share and reuse micro frontends with ease.
Not only that, but it also gives developers the tools they need to collab with other teams and expand the already existing components.
Also, learn about creating and adding micro frontends to your existing applications:
Build Microfrontends with reusable components

Bit is an open-source toolchain for the development of composable software.
With Bit, you can develop any piece of software — a modern web app, a UI component, a backend service or a CLI script — as an independent, reusable and composable unit of software. Share any component across your applications to make it easier to collaborate and faster to build.
Join the 100,000+ developers building composable software together.
Get started with these tutorials: