Introducing Watchers in Vue JS
Learn how to write a cleaner and more efficient VueJS code using Watchers
Vue JS was created by Evan You and 234+ community lovers. It is a very progressive framework for building user interfaces. It consists of an approachable core library that focuses on the view layer only, and an ecosystem of supporting libraries that helps you tackle complexity in large Single-Page Applications. In this post, you will be introduced to watchers, an exciting concept that will help you build mastery in Vue JS.
Tip: Share and reuse your Vue components to build apps faster as a team. Use tools like Bit (GitHub) to organize, share and reuse components across your apps. Give it a try.

Before we start
This post is suited for all levels of frontend developers that use Vue JS, so being conversant with beginner concepts and installation processes is not assumed. Here are a few prerequisites you should already have before you start to use Vue CLI 3 through this article.
You will need:
- Node.js 10.x and above installed. You can verify if you do by running node -v in your terminal/command prompt.
- The Node Package Manager 6.7 or above (NPM) also installed.
- A code editor: Visual Studio Code is highly recommended. (here’s why)
- Vue’s latest version installed globally on your machine.
- Vue CLI 3.0 installed on your machine. To do this, uninstall the old CLI version first:
npm uninstall -g vue-clithen install the new one:
npm install -g @vue/cliOR
- Download a Vue starter project here
- Unzip the downloaded project
- Navigate into the unzipped file and run the command to keep all the dependencies up-to-date:
npm installWhat are watchers?
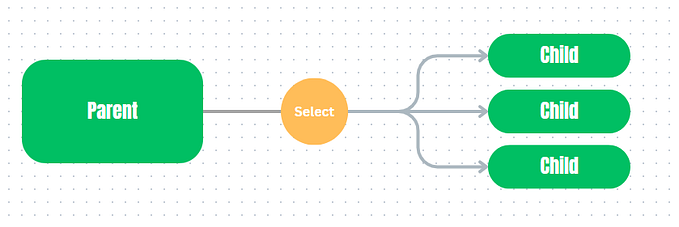
Vue JS was built to be a view-layer-focused JavaScript framework. This is why it is template-based. However, in the course of writing code, developers can get carried away by the ease of use so much, that they begin to overpopulate their Vue templates with too much logic. Vue discourages this and advises breaking your application into components to enhance modular development.
This is where watchers come into play, imagine that you can spy on a property you have in your Vue component and then be able to react to it when Vue notices a change in the said property. Of course you can setup an event handler and do it all in vanilla JavaScript, but Vue provides an even easier out-of-the-box way of doing this without even setting setting up any event listeners.
Why it is important
In Vue JS, watchers create a platform for developers to monitor changes in props for the view. This can also serve as an alternative to computed properties in Vue JS. Another important thing is that with watchers, you can mimic behaviours from the created lifecycle hook.
Watcher syntax
<script>
export default {
  watch: {  }
}
</script>
Demo: what you will build

To demonstrate the Vue JS watcher, you will build a simple money counting game. If you followed this post from the start, you must have downloaded the Vue starter project, unzipped it and opened it in VS Code.
Navigate to the main app.vue file and remove the image tag and then open the test.vue file inside the components folder and copy this code block below inside it:
<template>
  <div>
    <h2>The money Game</h2>
    <p>Jack and Jill both won 2 all-access tickets to the Amusement Park </p>
       <p>They both also have $0 each in their pockets and want to play the MG</p>
    <button v-on:click="addJack()">Add $1 to Jack</button>
    <button v-on:click="addJill()">Add $1 to Jill</button>
    <p>Jack: ${{jack}}</p> <p>Jill: ${{jill}}</p>
  </div>
</template><script>
export default {
  name: 'Test',
  data() {
    return {
     jack: 0,
     jill: 0
    }},
  methods: {
    addJack: function(){
      this.jack++;
    },
    addJill: function(){
      this.jill++;
    }
  },
  watch:{
    jack: function(){
      console.log('jack changed value');
    },
    jill: function(){
      console.log('jill changed value');
    }
  }

}
</script><!-- Add "scoped" attribute to limit CSS to this component only -->
<style scoped>
h3 {
  margin: 40px 0 0;
}
ul {
  list-style-type: none;
  padding: 0;
}
li {
  display: inline-block;
  margin: 0 10px;
}
a {
  color: #42b983;
}
button {
    background-color: rgb(58, 128, 194);
    border: none;
    color: white;
    padding: 15px 32px;
    margin: 5px;
    text-align: center;
    text-decoration: none;
    display: inline-block;
    font-size: 18px;
  }
</style>
Inside the code block in bold fonts, you can see how watchers can be set. Here the properties jack and jill are setup to be spied on. Watchers lets you specify logic inside functions for these spy operation, letting them take two arguments: oldValue and newValue. To test these arguments out, change the watch code block in your test.vue file to this:
watch:{
    jack: function(newValue, oldValue){
      console.log('jack had an old balance of $'+ oldValue);
    },
    jill: function(newValue, oldValue){
      console.log('jill had an old balance of $'+ oldValue);
    }
  }
You can re-run your application with the vue development server command:
npm run serve
Abstracting a lifecycle method
The very last function of watchers is the ability to abstract the created lifecycle method in Vue JS. So if you have any props that you want to get loaded or a function you want to be run on initialisation of the Vue instance you will normally use the created lifecycle hook to define that logic or behaviour. With Vue watchers, you can do exactly that too, this time without the need for including the lifecycle hook, that is something I find interesting.
Let us say in our example, jack and jill already got $1 each before you can start playing the money game, this can be a good use case to invoke a function on initialisation. Change the script section of the test.vue file to the code block below:
<script>
export default {
  name: 'Test',
  data() {
    return {
     forceJack: '',
     forceJill: '',
     jack: 0,
     jill: 0
    }},
  methods: {
    addJack: function(){
      this.jack++;
    },
    addJill: function(){
      this.jill++;
    }
  }
  ,
  watch:{
    jack: function(newValue, oldValue){
      console.log('jack had an old balance of $'+ oldValue);
    },
    jill: function(newValue, oldValue){
      console.log('jill had an old balance of $'+ oldValue);
    },
    forceJack: {
      handler: 'addJack',
      immediate: true
    },
    forceJill: {
      handler: 'addJill',
      immediate: true
    }
  }

}
</script>
To setup the abstraction, you will have to make the watcher an object and then provide the object with two properties:
- Handler: which is the method name you want to be run on initialisation.
- Immediate: which is the property that makes the hook mimic the created lifecycle hook.

Conclusion
You have been introduced to the property spying concept in Vue JS called watchers. You have also been shown the ways watchers can be setup and how to also make them become abstractions of the created lifecycle method. Happy hacking!